
Time Machine automatically deletes the oldest snapshots when space on the backup destination is inadequate. Snapshots may also be manually deleted by entering Time Machine. However, Time Machine only permits deletion of the currently displayed snapshot. Repeating this time-consuming process without exiting Time Machine may cause Time Machine to hang.
The "tmutil delete" shell command may be used to delete one or more snapshots, machine directories, or backup stores. The "tmutil delete" shell command requires root privileges, which may be obtained by logging in as the root user or using the "sudo" or "su" shell commands. Using the shell to delete Time Machine files also requires establishing access to the backup destination and determining the absolute paths to the backup files, which are tasks routinely performed by TM-Utilities.
TM-Utilities does not perform backups because there is no need to reinvent Time Machine's efficient backup process. Each snapshot is actually a collection of hard links, created and managed by Time Machine. Therefore, deleting a snapshot can be a time-consuming, complex process, best handled by Time Machine itself.
The TM-Utilities philosophy is to improve access to and enhance maintenance of the Time Machine backup files. Since the need to delete machine directories or backup stores is limited, TM-Utilities provides safe deletion of snapshots only.
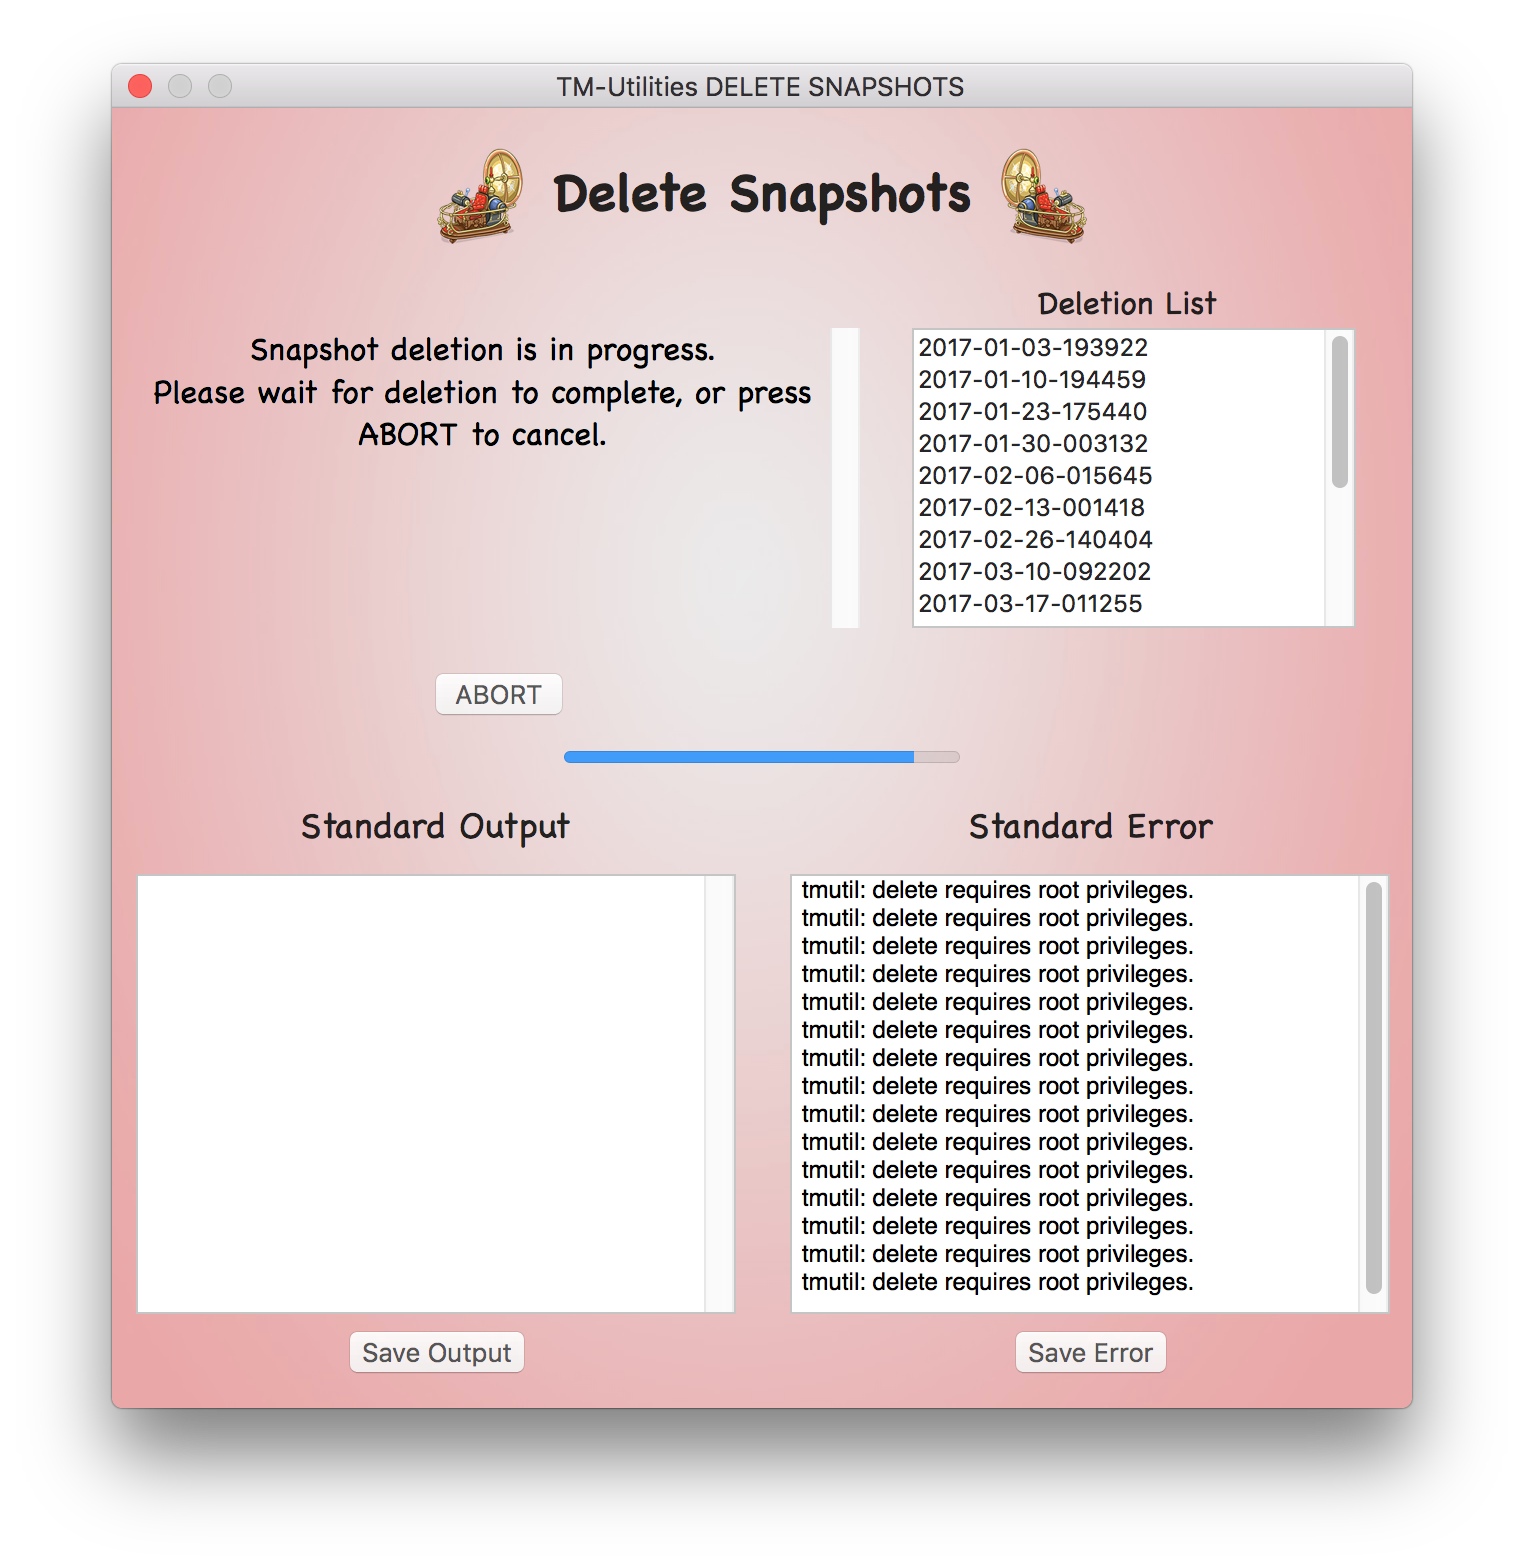
TM-Utilities uses the "tmutil delete" shell command repeatedly to delete snapshots, giving Time Machine full control of the backup files. All "tmutil delete" shell commands are executed asynchronously in the background. Although TM-Utilities will not attempt to interrupt an executing "tmutil delete" shell command, a list of snapshots to be deleted may be aborted, allowing the currently executing "tmutil delete" shell command to complete.
For further safety, TM-Utilities will not delete all snapshots and only allows deletion of the oldest snapshots.
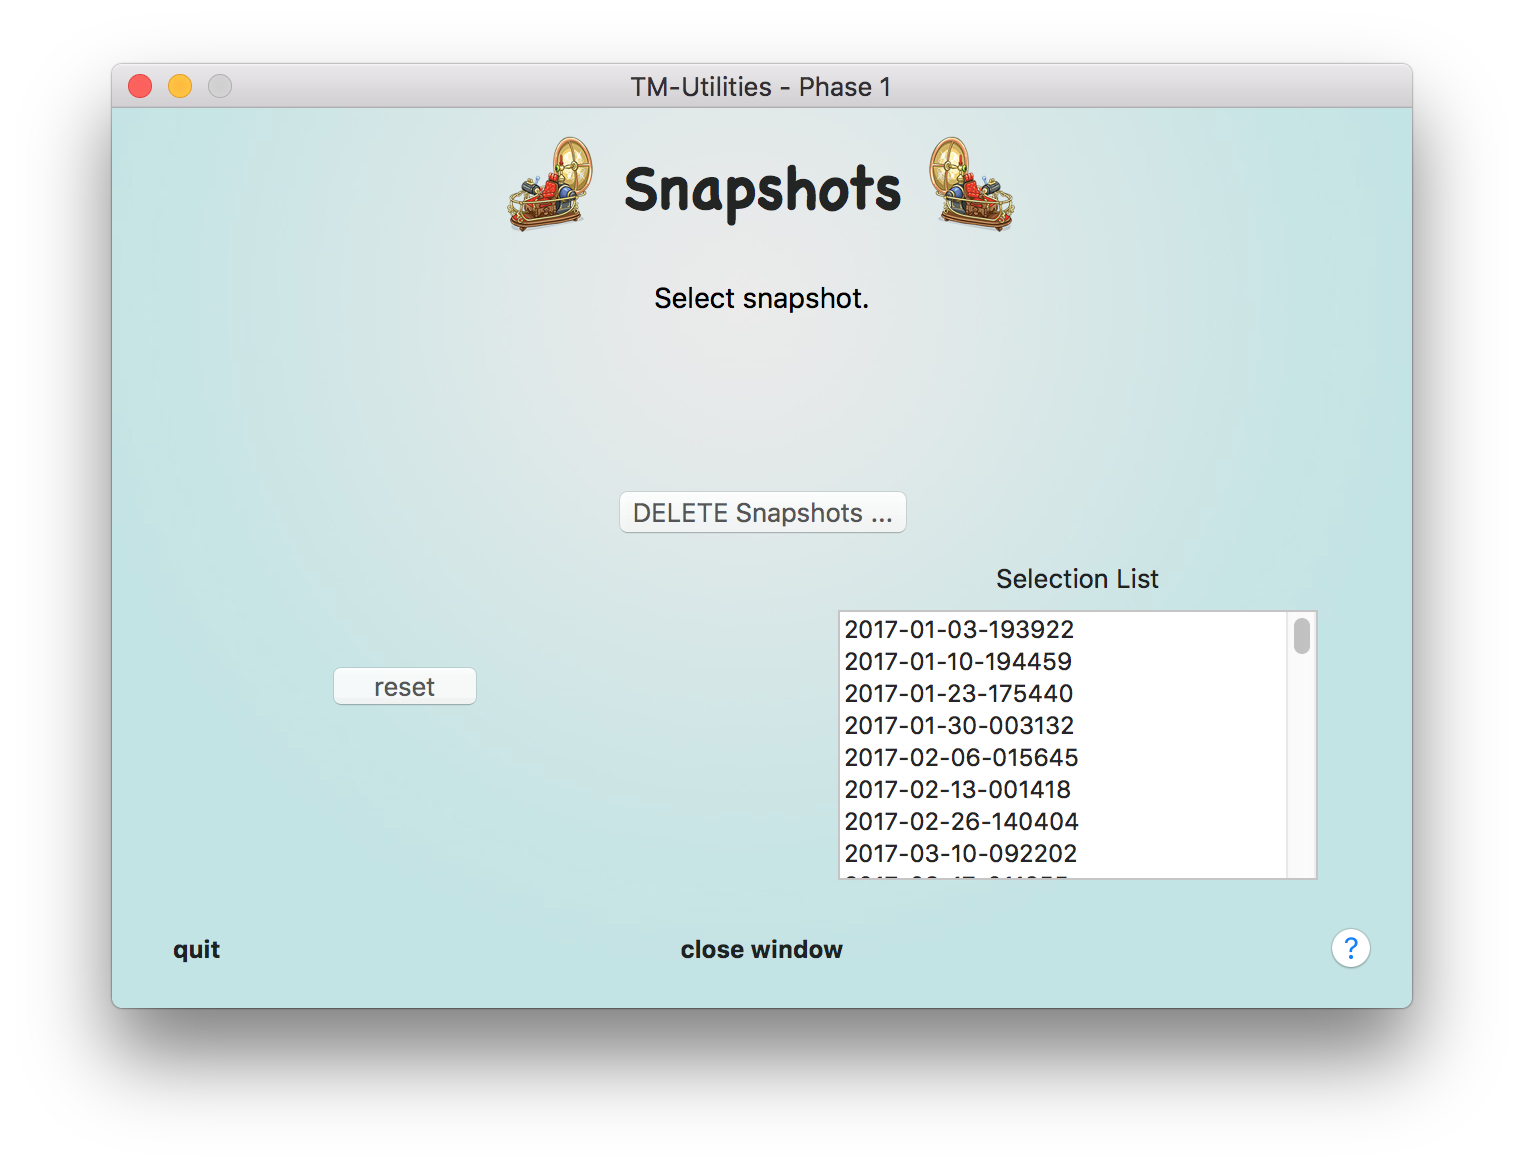
The TM-Utilities Delete Snapshots function appears in its own modal window, disabling any other TM-Utilities functions until the window is closed. It is accessed with the "DELETE Snapshots ..." button, which appears when the snapshot list is loaded in the Snapshots window.
The "tmutil delete" shell command requires root privileges. TM-Utilities PRO allows privilege elevation, but the App Store version does not. The App Store version requires activating the root account and logging into macOS as the root user to delete snapshots.
The "DELETE Snapshots ..." button appears in the Snapshots window when the snapshot list is loaded for selection. In the App Store version, the "DELETE Snapshots ..." button will only appear for the root user.
The Delete Snapshots process consists of 5 steps:
Step 1 will be repeated if all snapshots are selected (illegal operation). Otherwise, steps 1-4 proceed one-way in a forward direction without repetition. Step 5 may be executed at any time prior to step 3, and step 3 may be aborted.
TM-Utilities will be reset after exiting Delete Snapshots if step 3 was started.
The Delete Snapshots window is divided into 4 quadrants. The upper left quadrant is the message center, which provides context-sensitive information and guidance. The context-sensitive "Cancel/ABORT/EXIT" button appears below the message center. The upper right quadrant displays the snapshot/deletion list and the context-sensitive "DELETE" button. The lower quadrants display the contents of the shell's standard output (left) and standard error (right), which may be saved to disk. A progress bar appears in the center of the window during the deletion process.
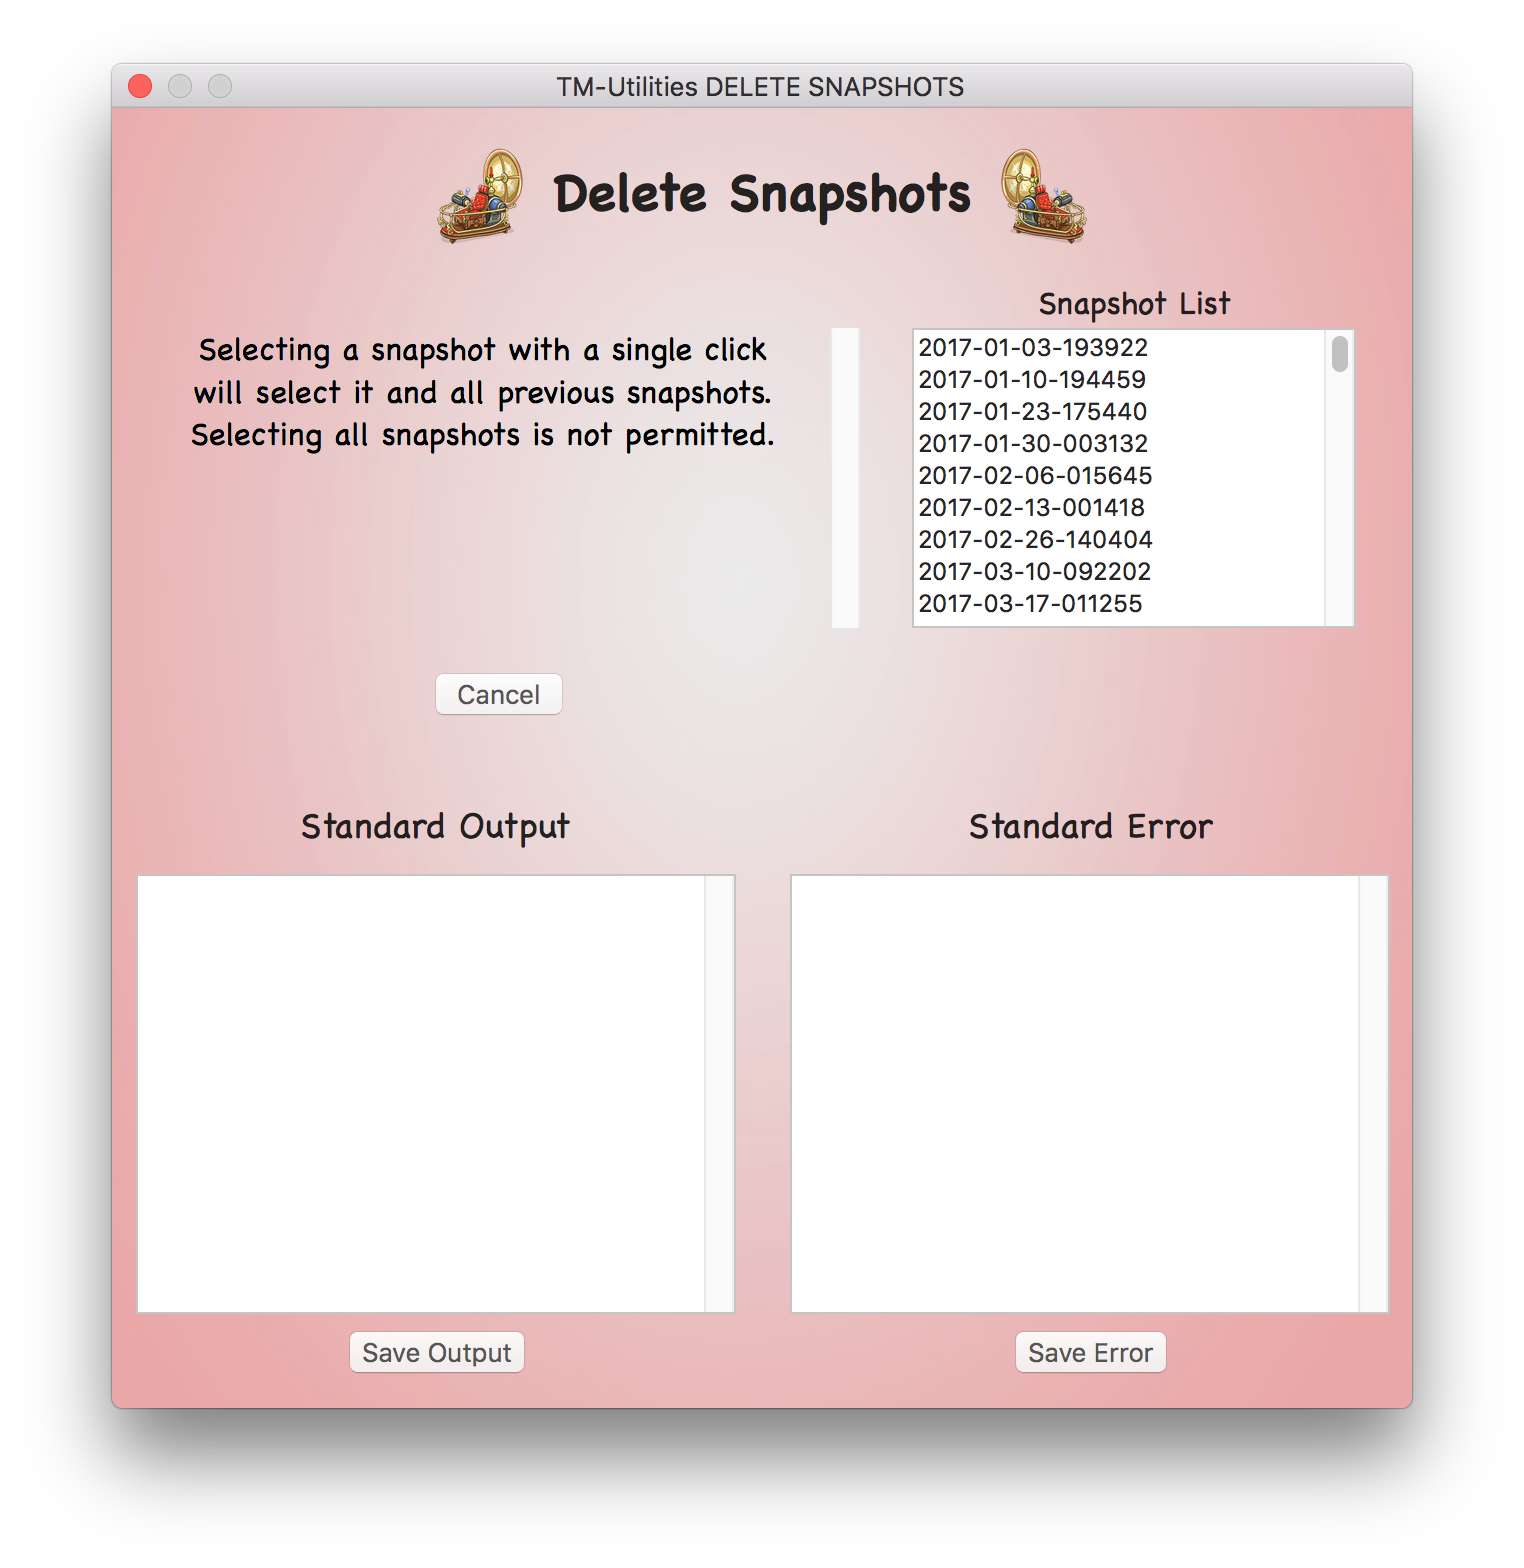
Create a deletion list with a single click on an entry in the snapshot list. Selecting all snapshots will be ignored.

Request deletion by clicking the "DELETE" button below the deletion list.

Confirm deletion by clicking the "DELETE" button again. The deletion process starts.
Review the results and, optionally, save the output.
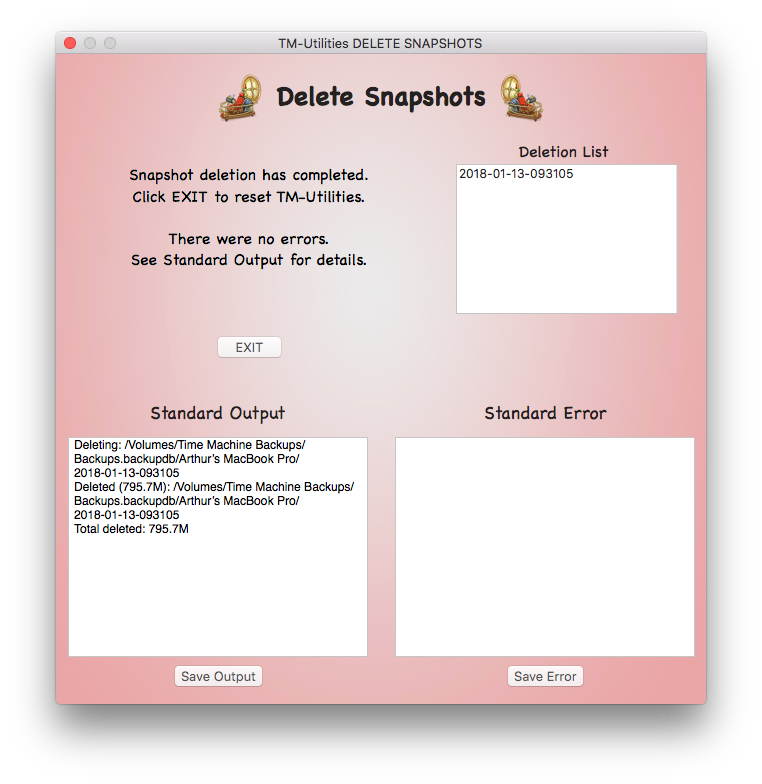
Exit by clicking the "EXIT" button under the message center or the red close window button in the upper left corner.
©2019 Arthur Rosel, Ltd. All rights reserved.